How to Create an Agent
This guide walks you through creating an AI agent from scratch using the Agent Builder.
Step 1: Open the Agent Builder
Navigate to Build > Agents in the sidebar, or click New Agent from the home dashboard.
You'll see the Agent Builder with 11 configuration tabs:
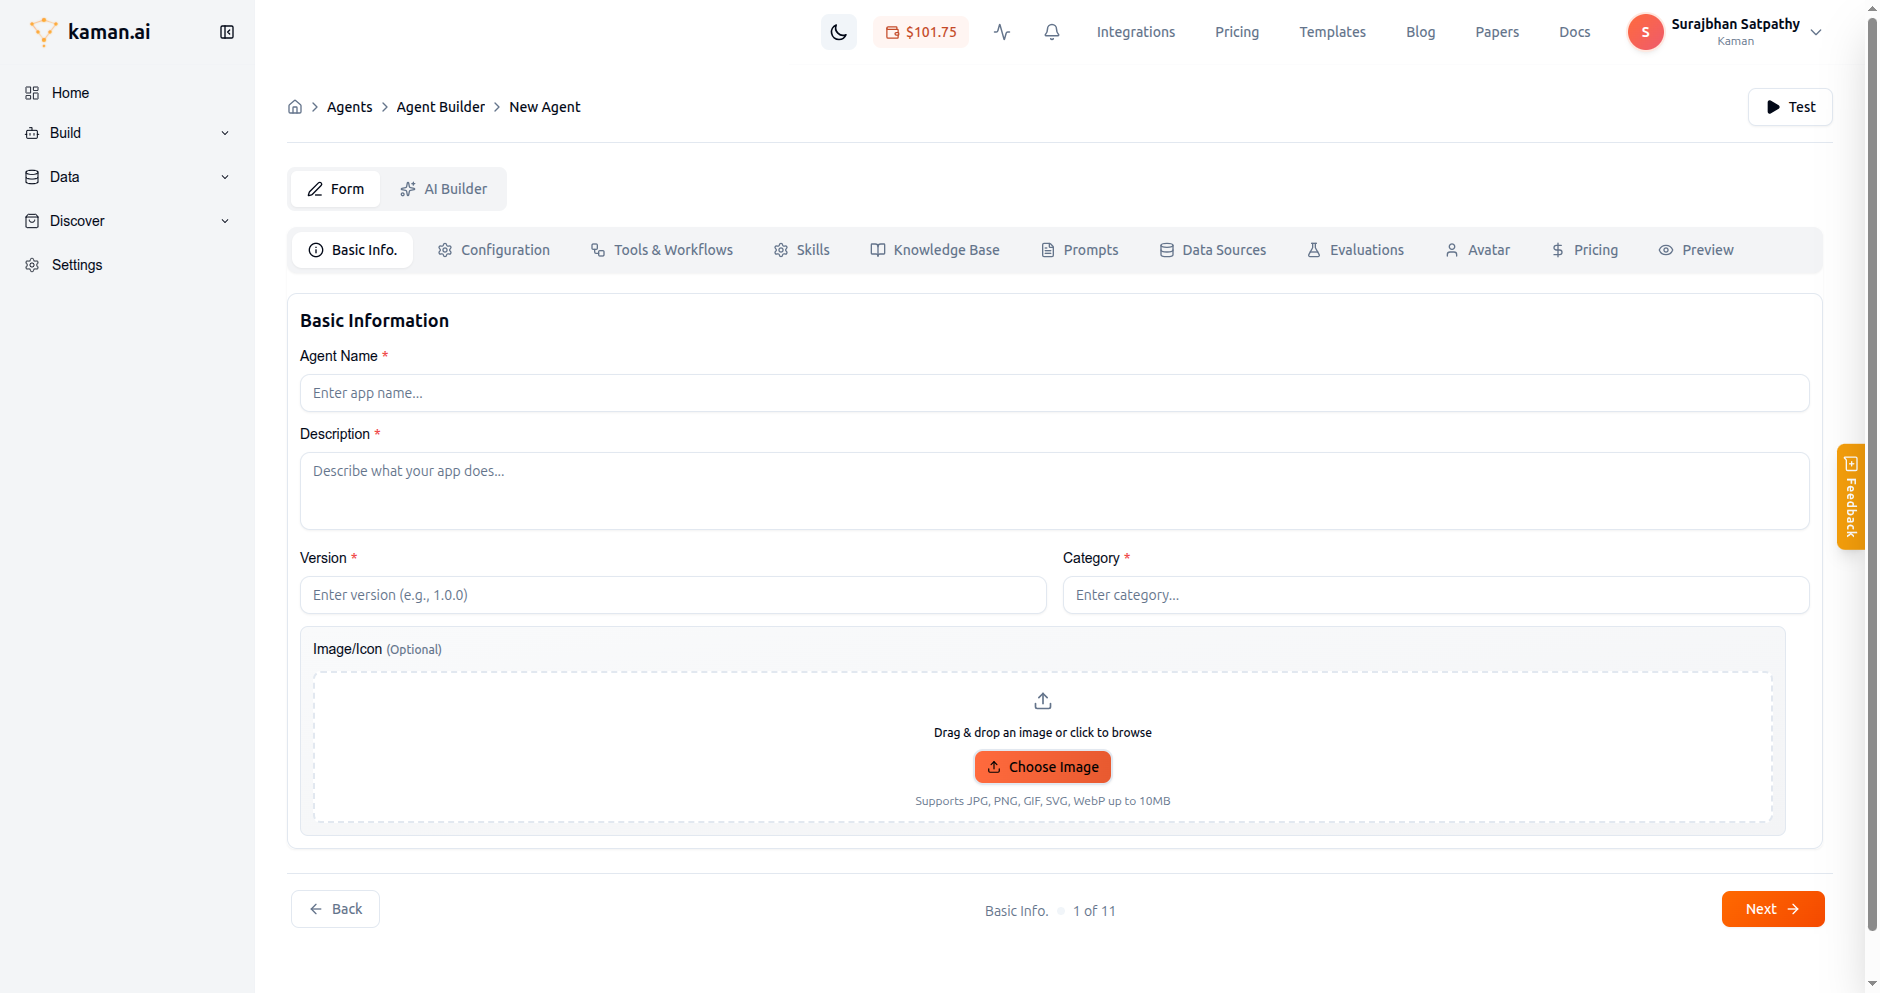
Notice the two builder modes at the top:
- Form — Step-by-step form to configure each aspect of your agent
- AI Builder — Describe what you want and let AI generate the agent for you
Step 2: Fill in Basic Information
Fill in the required fields:
| Field | Required | Description |
|---|---|---|
| Agent Name | Yes | A clear, descriptive name (e.g., "Customer Support Agent") |
| Description | Yes | What your agent does. This helps users understand its purpose. |
| Version | Yes | Semantic version (e.g., 1.0.0) |
| Category | Yes | Category for discovery (e.g., "Support", "Sales", "Operations") |
| Image/Icon | No | Upload a JPG, PNG, GIF, SVG, or WebP image (up to 10MB) |
Click Next to proceed.
Step 3: Configuration
Set up how your agent behaves:
- System Instructions — The system prompt that defines your agent's personality, rules, and behavior. This is the most important field.
- Model — Select the AI model (GPT-4, Claude, Gemini, etc.)
- Temperature — Controls creativity (0 = precise, 1 = creative)
- Tool Confirmation — Enable to require user approval before tools execute
Tip: Write detailed system instructions. Include the agent's role, what it should/shouldn't do, response format preferences, and any domain knowledge.
Step 4: Attach Tools & Workflows
Click the Tools & Workflows tab to give your agent capabilities:
- Tools — Functions your agent can call (e.g., query a database, send an email, search the web)
- Workflows — Multi-step automated processes your agent can trigger
To add a tool:
- Click Add Tool
- Search for available tools by name or description
- Select the tools you want
- Configure tool confirmation settings (optional)
Step 5: Add Knowledge Base (Optional)
Click Knowledge Base to give your agent domain knowledge:
- Click Add Knowledge Source
- Upload documents (PDF, DOCX, TXT, CSV)
- Or connect to an existing knowledge base
Your agent will use RAG (Retrieval Augmented Generation) to answer questions based on these documents.
Step 6: Configure Data Sources (Optional)
Click Data Sources to connect your agent to live data:
- Connect to databases (PostgreSQL, MySQL, MongoDB, etc.)
- Connect to SaaS tools (Salesforce, HubSpot, Google Sheets, etc.)
- Your agent can query this data in real-time during conversations
Step 7: Preview and Publish
Click Preview (the last tab) to review your agent configuration:
- Verify all settings look correct
- Click Test (top right) to chat with your agent before publishing
- Click Publish to make your agent available
Step 8: Chat with Your Agent
After publishing, you can chat with your agent:
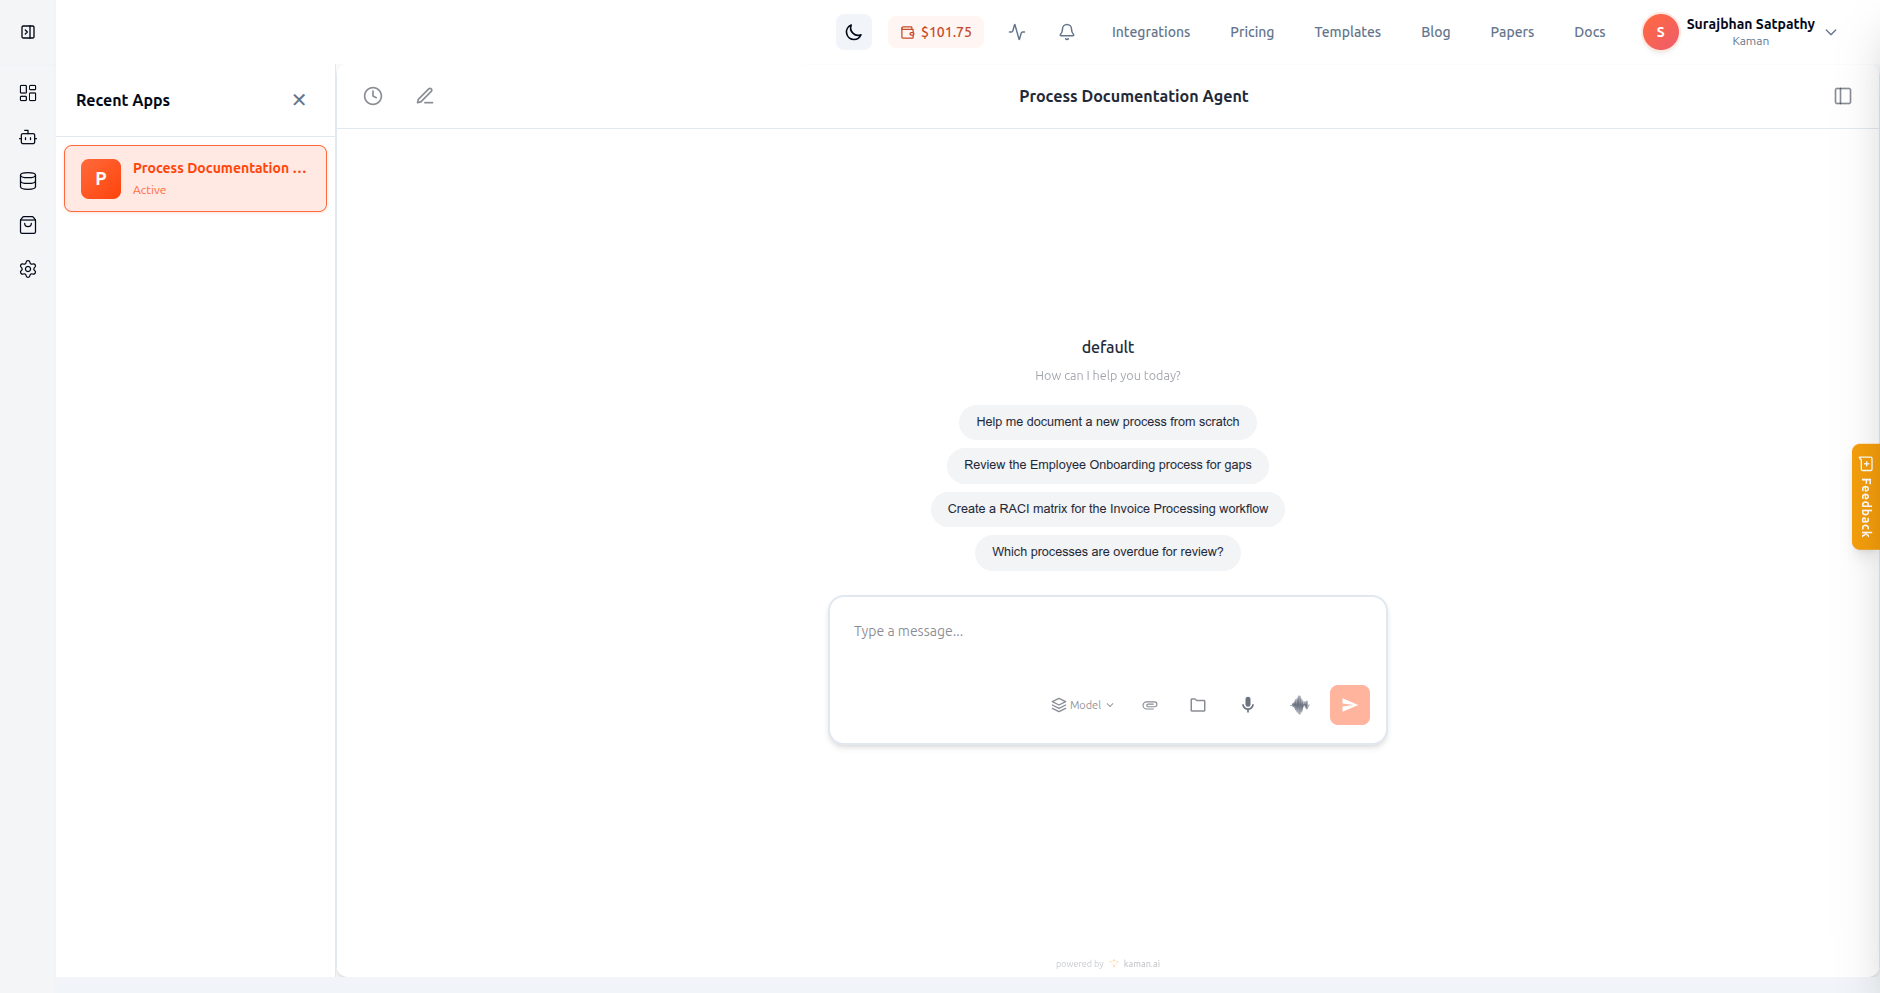
- Type your message in the input box
- Click the Send button (or press Enter)
- Your agent will respond, potentially using tools and knowledge you configured
- Use suggestion buttons for quick interactions
- Click the Model dropdown to switch models mid-conversation
- Use the attachment button to share files with your agent
Tips for Great Agents
- Be specific in system instructions — "You are a customer support agent for an e-commerce store" is better than "You help people"
- Choose the right model — GPT-4 and Claude for complex reasoning, faster models for simple tasks
- Start with fewer tools — Add tools incrementally and test each one
- Test thoroughly — Use the Test button before publishing
- Use templates — Browse Templates for pre-built agents you can customize